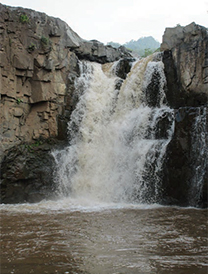
Zarwani Waterfalls
The attached picture is of Zarwani waterfalls at Shoolpaneshwar Wildlife Sanctuary. Please provide your expert advice and tips to further enhance the picture by post processing.
Manish Sitlani, Vadodara
There are two basic ways to photograph waterfalls – (a) the way you have done it, by using faster shutter speeds to freeze the water, or (b) by using slow shutter speeds to convey motion. Both are fine.
While photographing any subject, one has to be very careful about the background. Generally speaking, bald skies do not add to a picture; rather, they distract attention from the main subject. Post-processing allows us to add a suitable sky to enhance such images. It would help if you have an assortment of sky images to choose from. There are different ways to replace the sky, but here is a simple method which I have followed.
• Open both the images in Photoshop – the sky image and the waterfall image (PS 1). Ensure that the Layers panel is visible (if not, click the F7 key on the keyboard).
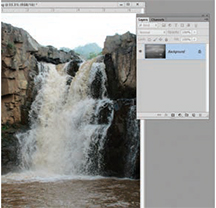
• Select the waterfall image. It will show as Background in the Layers panel. (PS 2)
• Duplicate this Background layer by dragging it to the ‘Create a new layer’ icon at the bottom of the Layers panel. This will show as Background copy in the Layers panel.
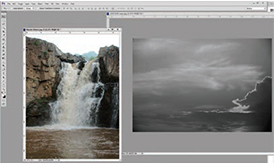
• Select the new sky image and using the Move tool, drag it over the waterfall image. In the Layers panel, this will show as Layer 1. (PS 3)
• In the Layers panel, using the computer mouse, drag Layer 1 under the Background copy. When you do that, the waterfall image will be revisible. (PS 4)
• Select the Background copy layer.
• Add a Layer Mask (click on the square with a circle in it, at the bottom of the Layers panel). (PS 5)
• Using the Magic Wand tool, select the sky.
• Select the Gradient tool (PS 6). Ensure that Linear Gradient and Foreground to Transparent is selected at the top. Also ensure that black is the foreground colour. Drag downwards from the top of the image to cover the sky area.
• Press Ctrl. D to deselect.
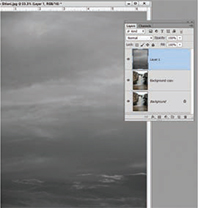
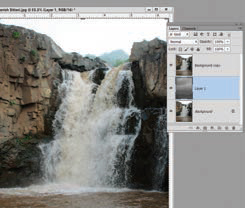
• In case you want to change the area of the visible sky in the picture, select Layer 1 and move the sky using the Move tool.
• Flatten the image and save the file using the Save As command.
Note: It is important to select the right sky for a particular scene. For example, if the main subject was photographed during the rainy season (when the sky is usually not blue), your selected sky should not be blue like what you see in mountainous regions. Also, the direction of lighting should be identical in the original scene and the new sky.

